Introduction
Tray.io is a low-code automation builder for companies to simplify and automate their complex tasks. It had a range of built-in connectors to help user that have no code knowledge to complete their daily routine. Not only that, if the user wanted to connect to a service that is not included in the built-in connectors, user can also use some helper connector to do so. For example, user might want to use an external service to perform some validation on their imported data.
In this tutorial, we are going to show you how to use the FraudLabs Pro API in Tray.io to validate an order record from your data source.
Prerequisite
Before we start, make sure you have the FraudLabs Pro API key with you. You can obtain it by login to your FraudLabs Pro account and copy from the License Overview section. If you do not have any account, you can also register a free account for the API Key at here. This tutorial will also use Airtable as the example data source, so please make sure you have one too.
Steps to use FraudLabs Pro API in Tray.io
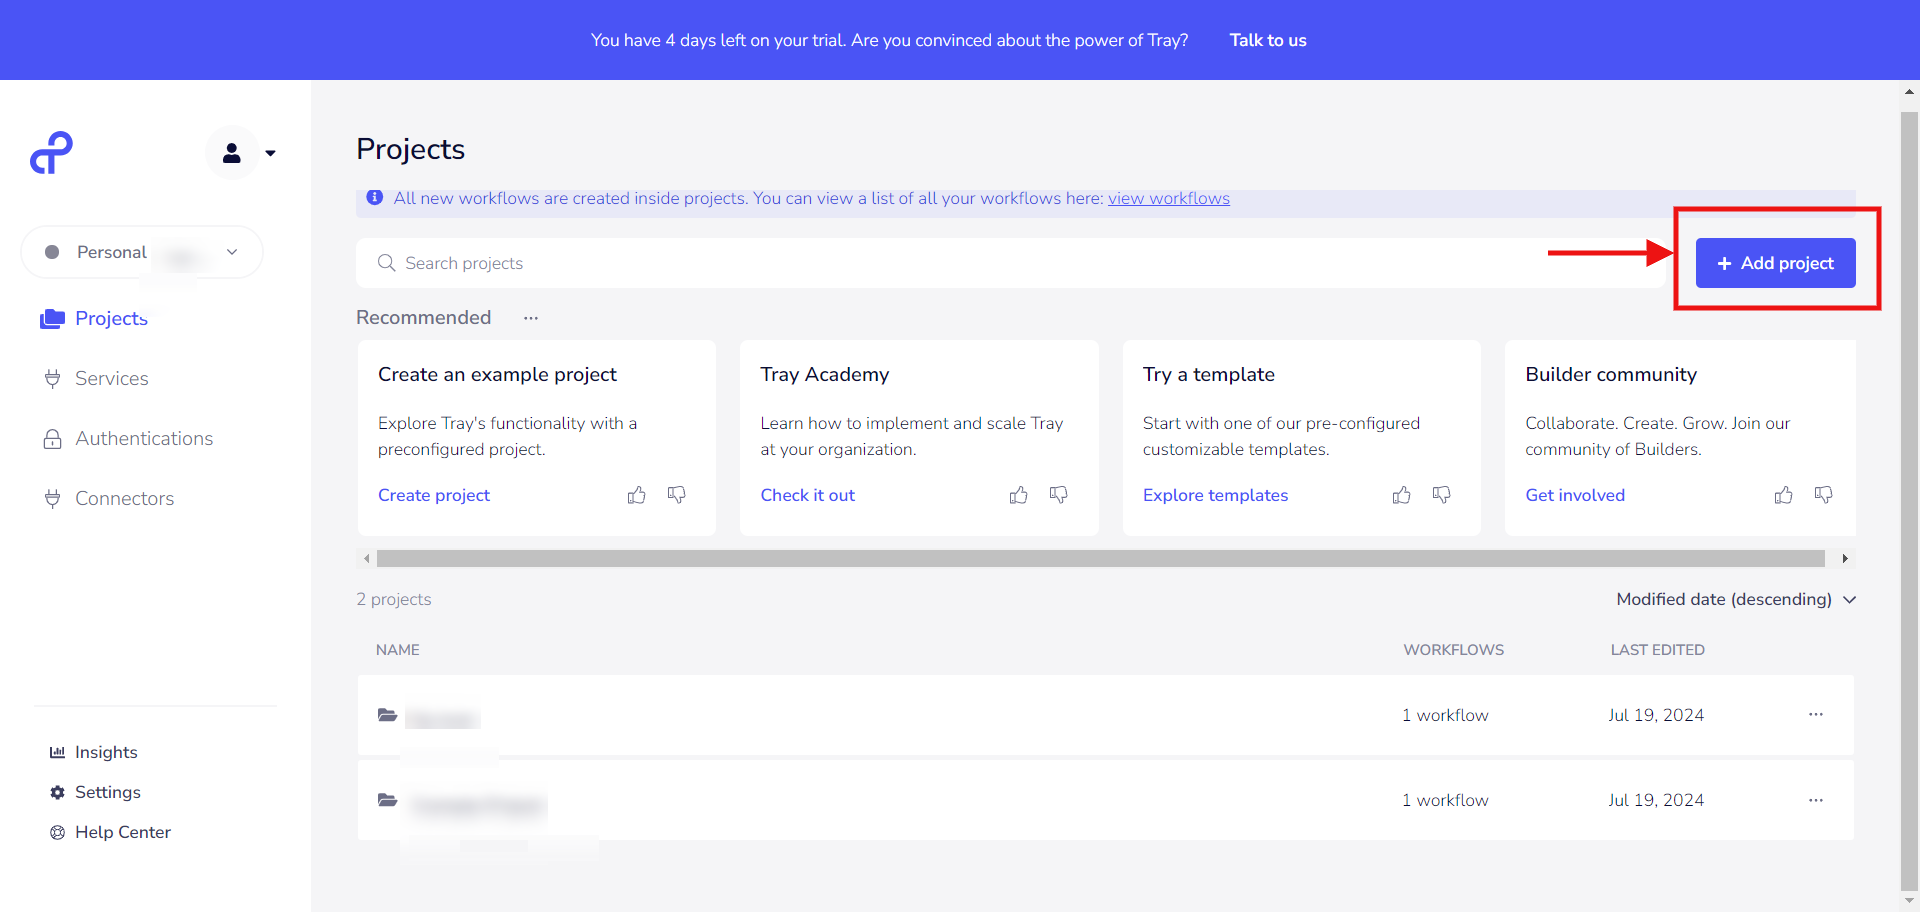
- Login to your Tray.io dashboard, and go to the Projects page.
- Click on the “Add project” button and click the “New project” from the dropdown menu to create a new blank project.
- In the pop-up dialog, enter “Handling order” in the text field under the “Project name” label. You can also configure other fields such as Description or Tags, but we will skip those for now and proceed to click on the Create button.
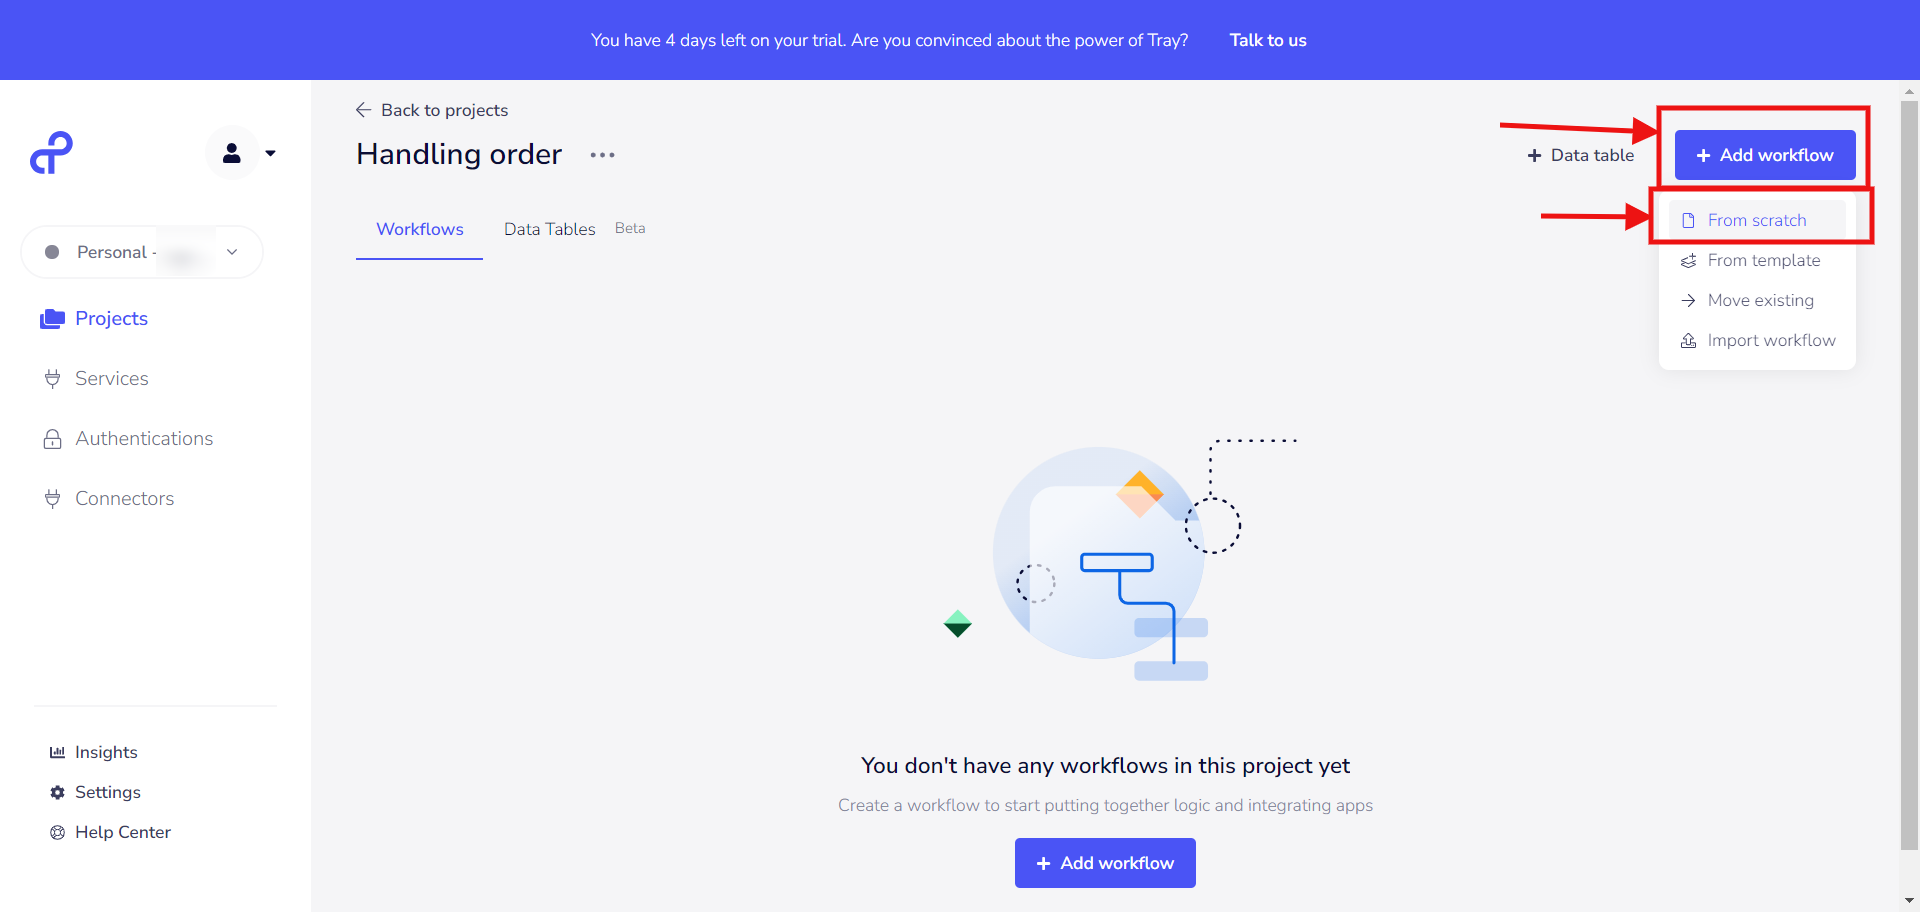
- Click on the project created at step 3, and click on the Add workflow button to create a new workflow. Then click on the “From scratch” from the dropdown list.
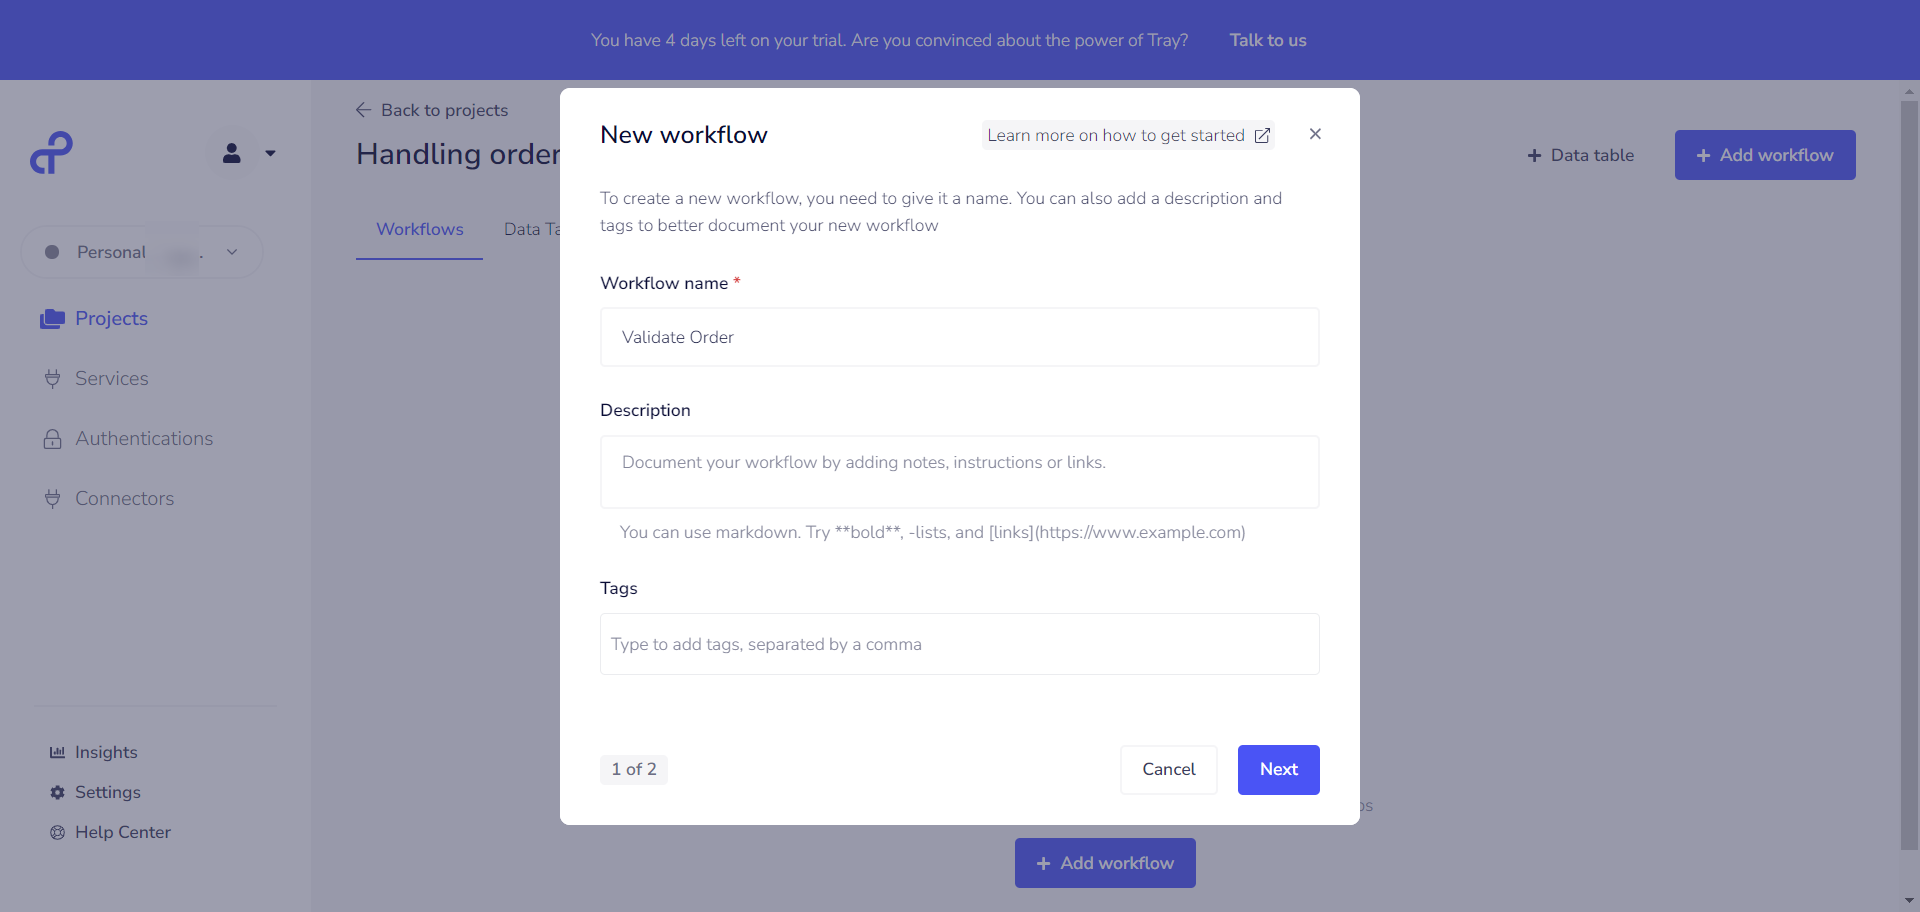
- In the pop-up dialog, for the Workflow name, enter “Validate Order” as the value. Again you can also configure other fields such as Description or Tags, but we will skip those for now and proceed to the next step by clicking on the Next button.
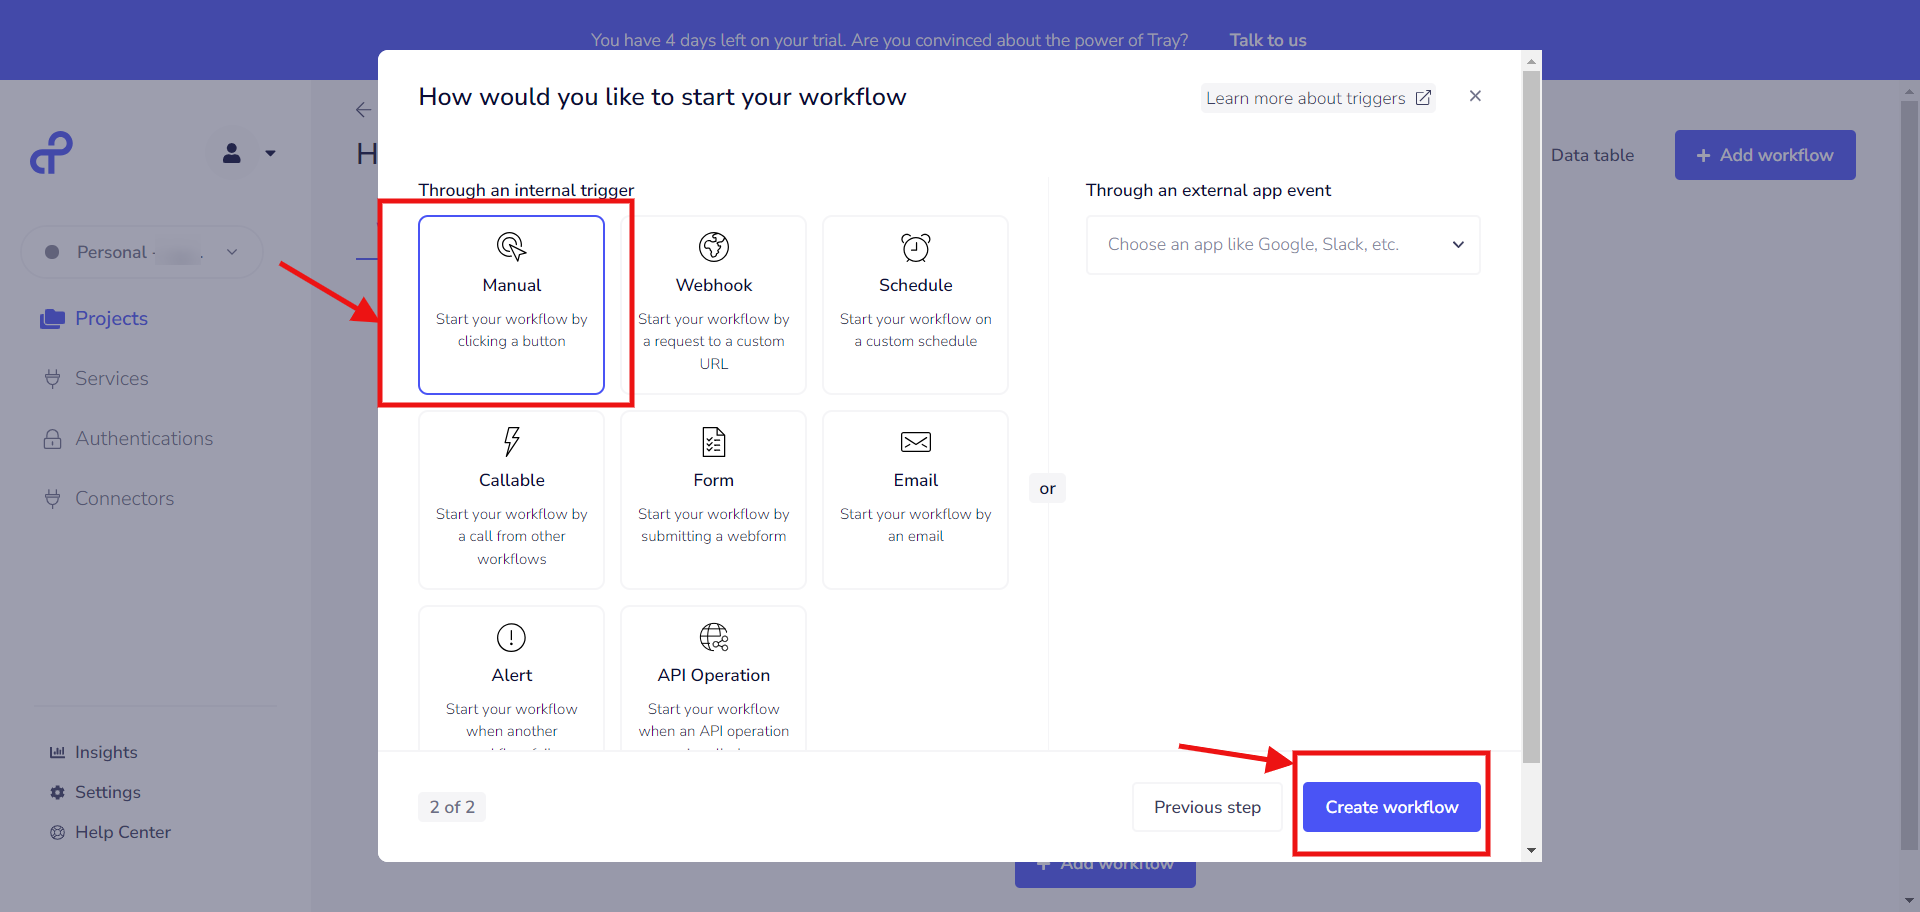
- In the next step in the dialog, you will need to choose how to start your workflow. For this time, we will choose to manually start the workflow, so click on the “Manual” option under the Through an internal trigger section. Click on the Create workflow to complete the process.
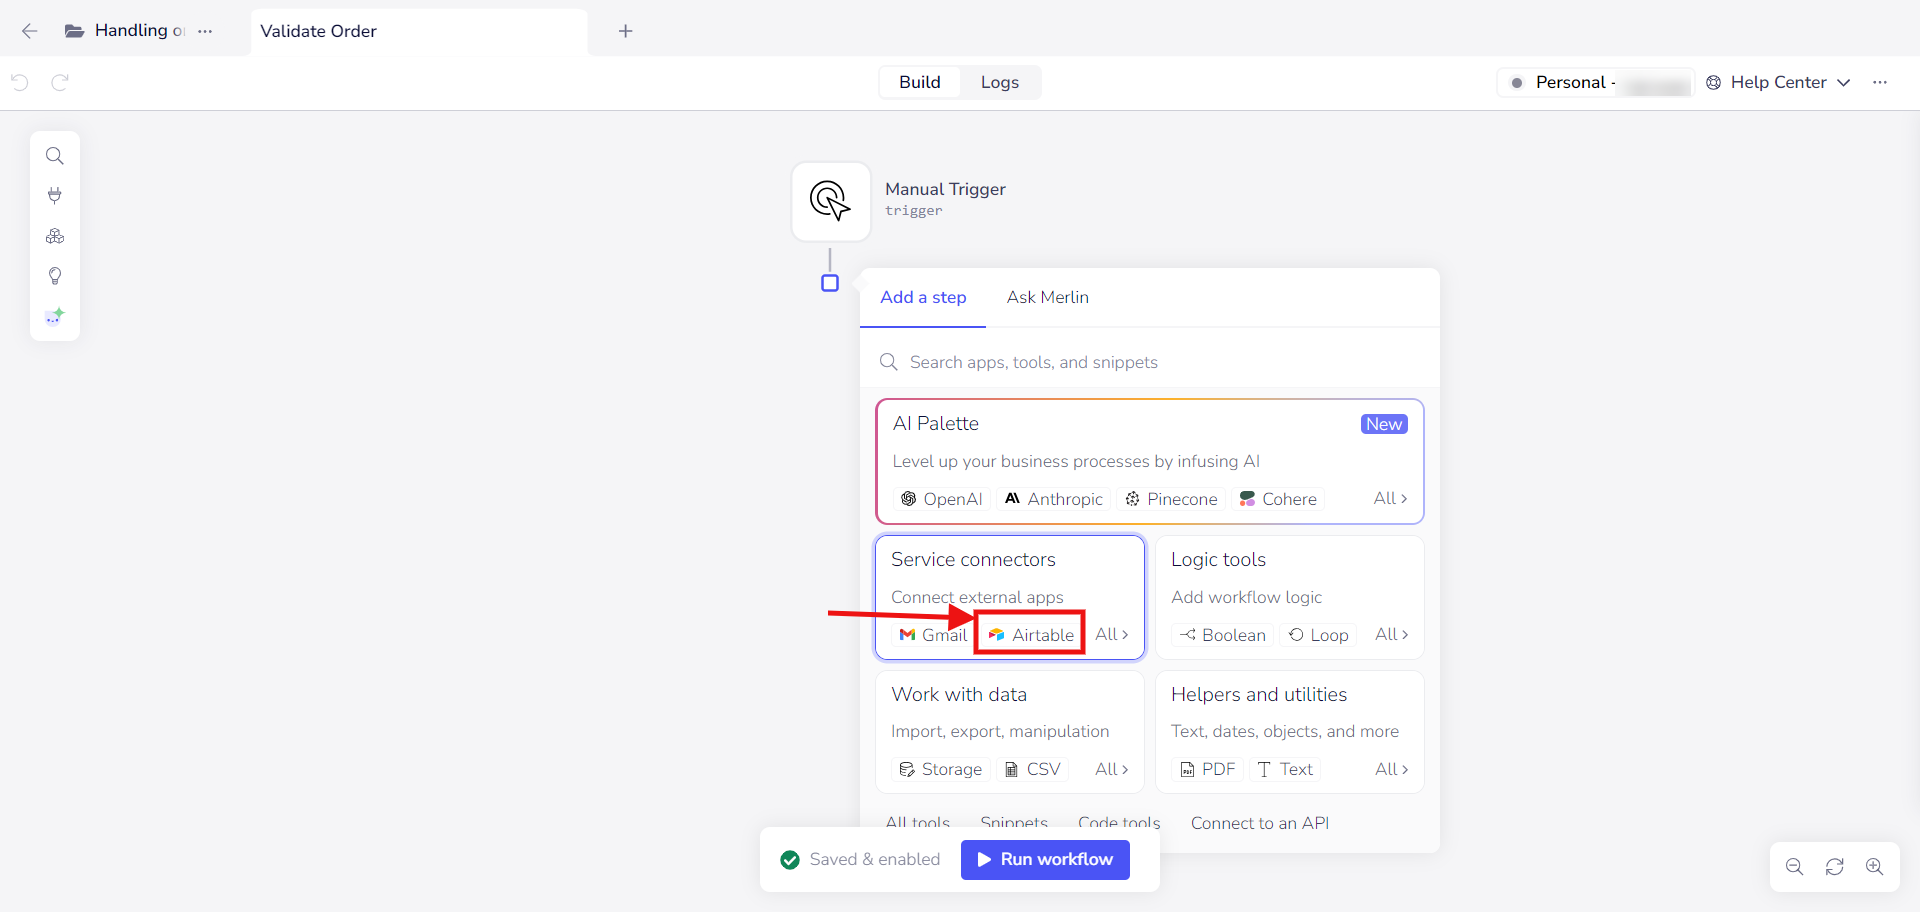
- A new workflow screen will be displayed to you. In the screen, you will now need to add the Airtable app to import order records from your Airtable view into FraudLabs Pro API. Click on the + button, and click on the Airtable from the Service connectors section.
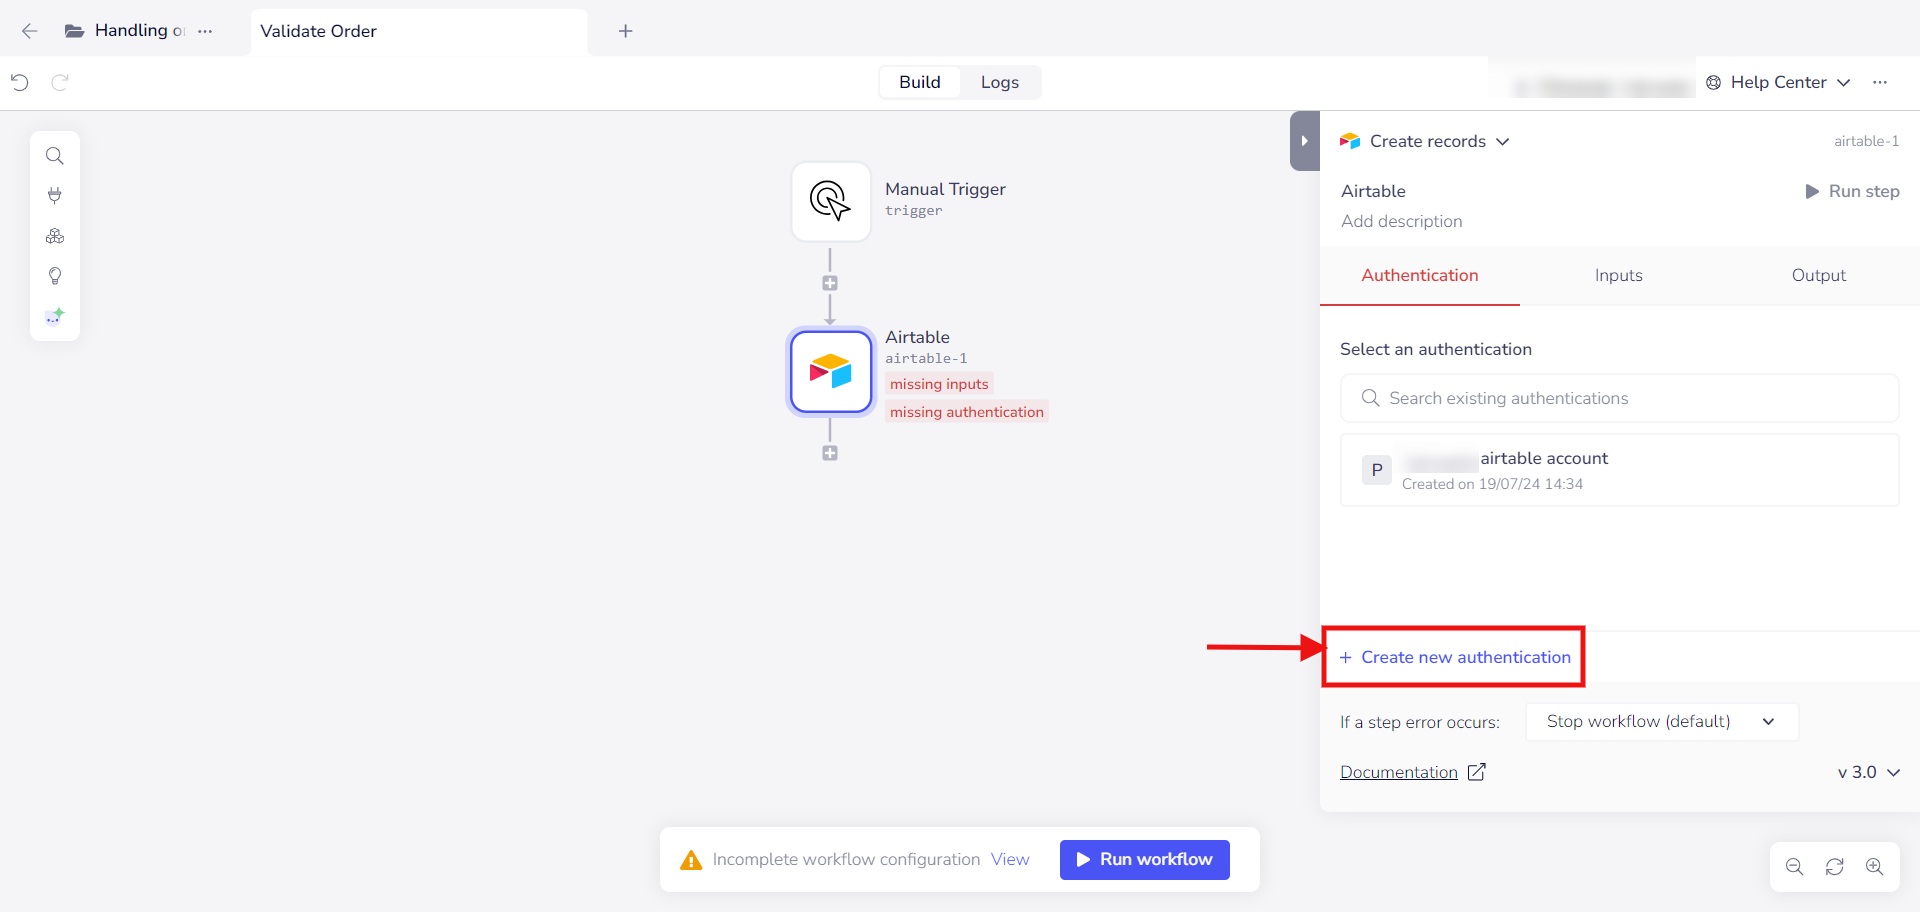
- You will need to select an existing Airtable authentication before continue. If you do not have one previously, you can click on the Create new authentication link to create a new Airtable authentication. For more information on adding new Airtable authentication, you can refer to their documentation.
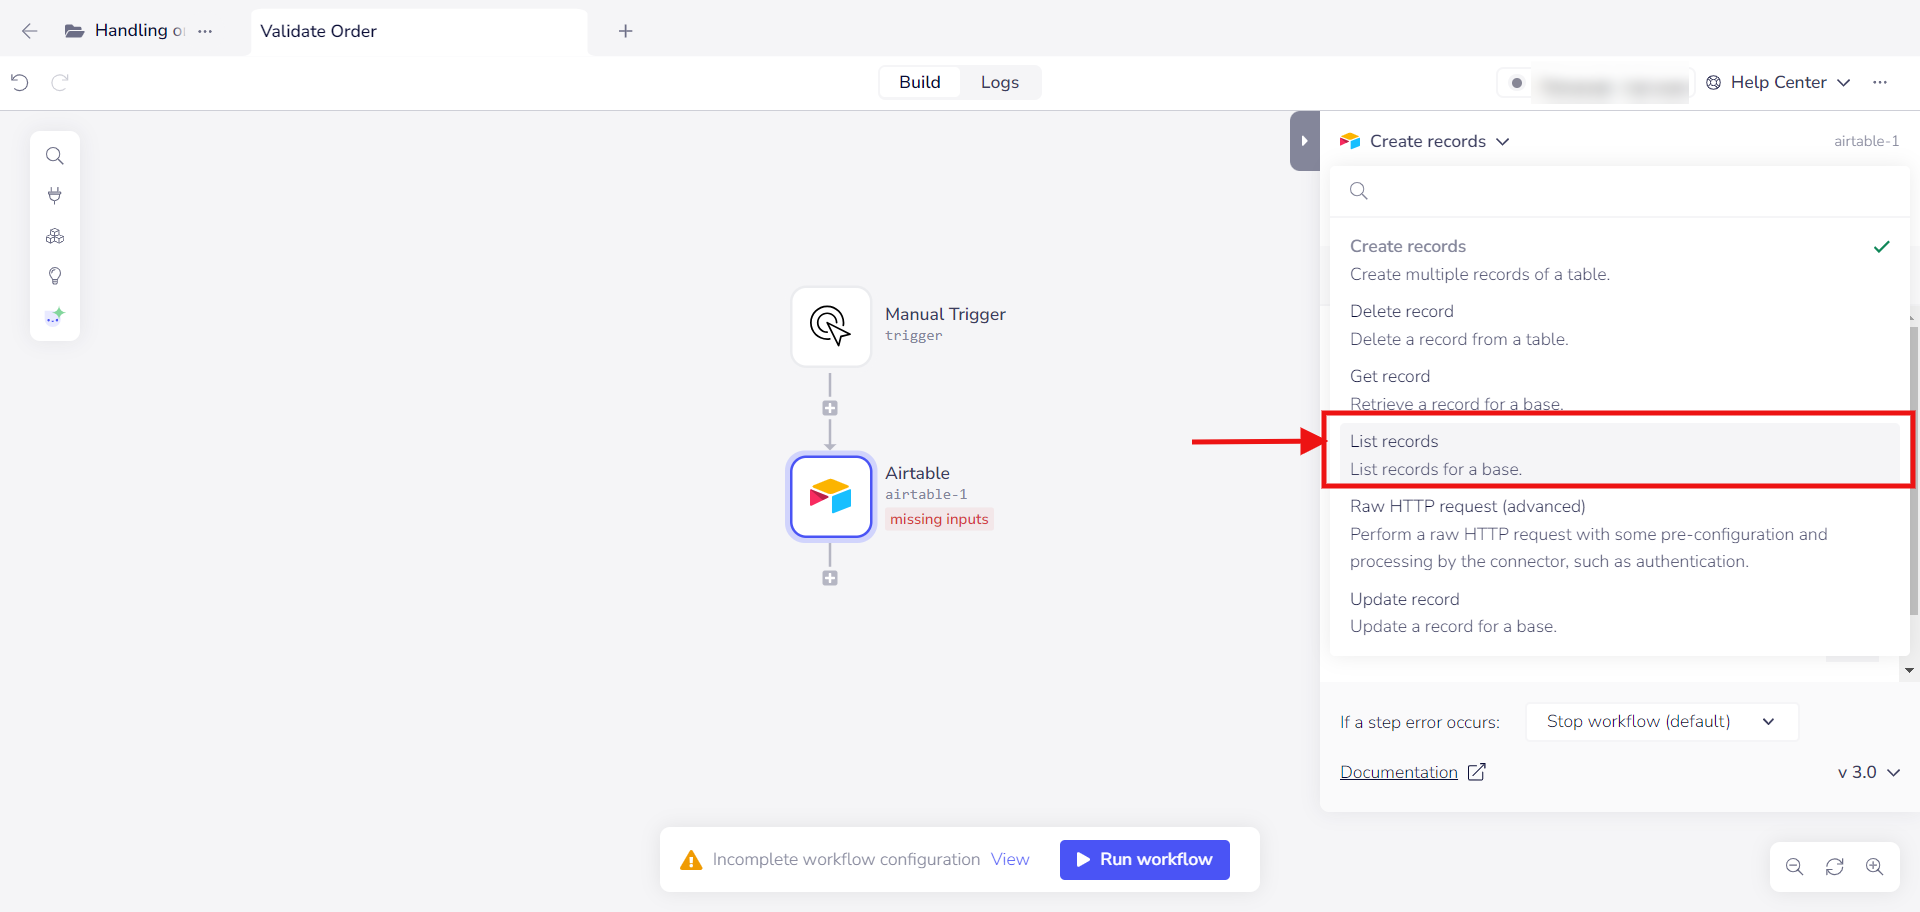
- By default, the action for Airtable will be Create record. We will want to retrieve all records here, so let’s change the action. Click on the Create records, and click on the List records from the dropdown list.
- Next, go to the input tab, and you will need to enter your Airtable base, table and view ID here. You can find the IDs in your browser address bar URL when you login to your Airtable account and opened a view. Your URL should be similar like “https://airtable.com/appkJ8LvR3GISCZ42/tblkKAfzXesoSBUOm/viwNJU8Vbq2eILLe0“, where:
- The base ID starts with app
- The table ID starts with tbl
- The view ID starts with viw
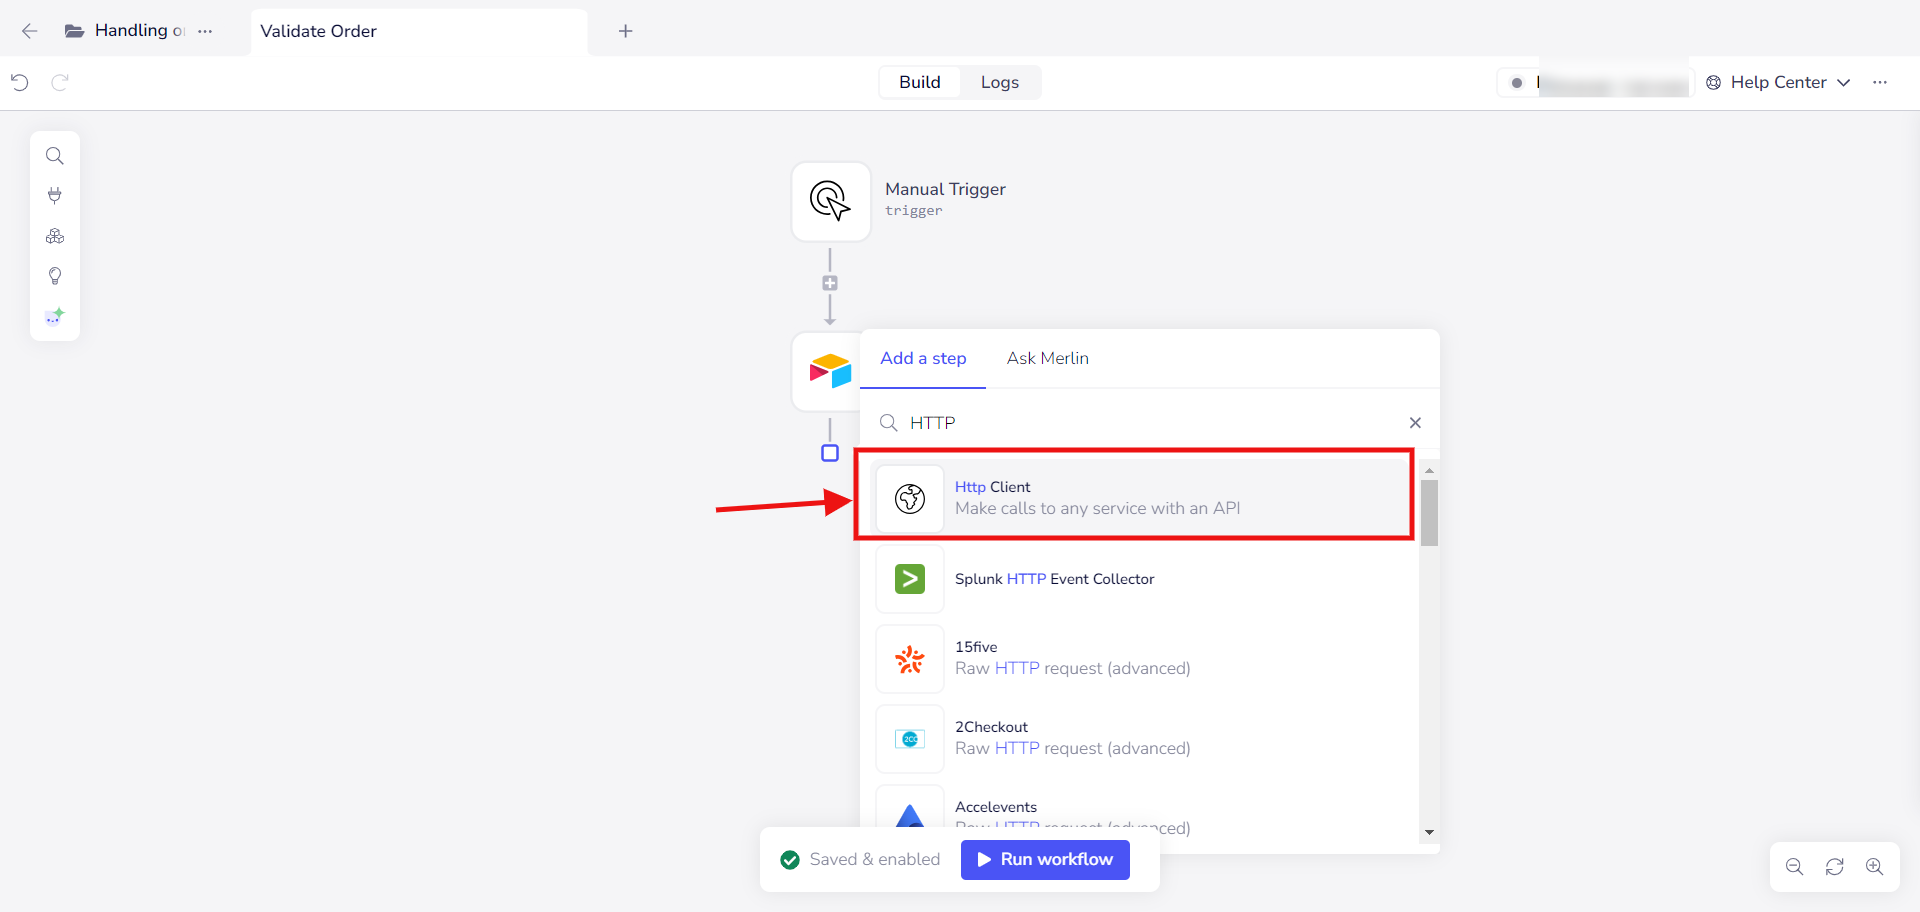
- Next, click on the + button at the bottom of the Airtable, and type ‘HTTP’ in the search bar. In the search result, click on the HTTP Client.
- In the HTTP client section, make sure the method shown in the top is POST. Click on the Import at the side to import the input schema.
- In the Import cURL dialog, copy and paste the following code into it, and change the “Enter_License_Key” to your API Key. Click the Import button to continue, and click the Confirm button if a confirmation screen shows up.
curl https://api.fraudlabspro.com/v2/order/screen \
--header 'Content-Type: application/json' \
--data '{
	"key": "Enter_License_Key",
	"format": "json",
	"ip": "IP_Address",
	"bill_city": "Cleveland",
	"bill_state": "OH",
	"bill_zip_code": "44115",
	"bill_country": "US",
	"ship_addr": "4987 Bingamon Road",
	"ship_city": "Cleveland",
	"ship_state": "OH",
	"ship_zip_code": "44115",
	"ship_country": "US",
	"email_domain": "gmail.com",
	"user_phone": "440-5551961",
	"email_hash": "Email_Hash",
	"bin_no": "558265",
	"bank_name": "Bank of Ocean View",
	"bank_phone": "212-500-2489",
	"card_hash": "Card_Hash",
	"avs_result": "Y",
	"cvv_result": "M",
	"user_order_id": "7893",
	"amount": "99.95",
	"quantity": "1",
	"department": "Online Store",
	"payment_mode": "creditcard"
}'
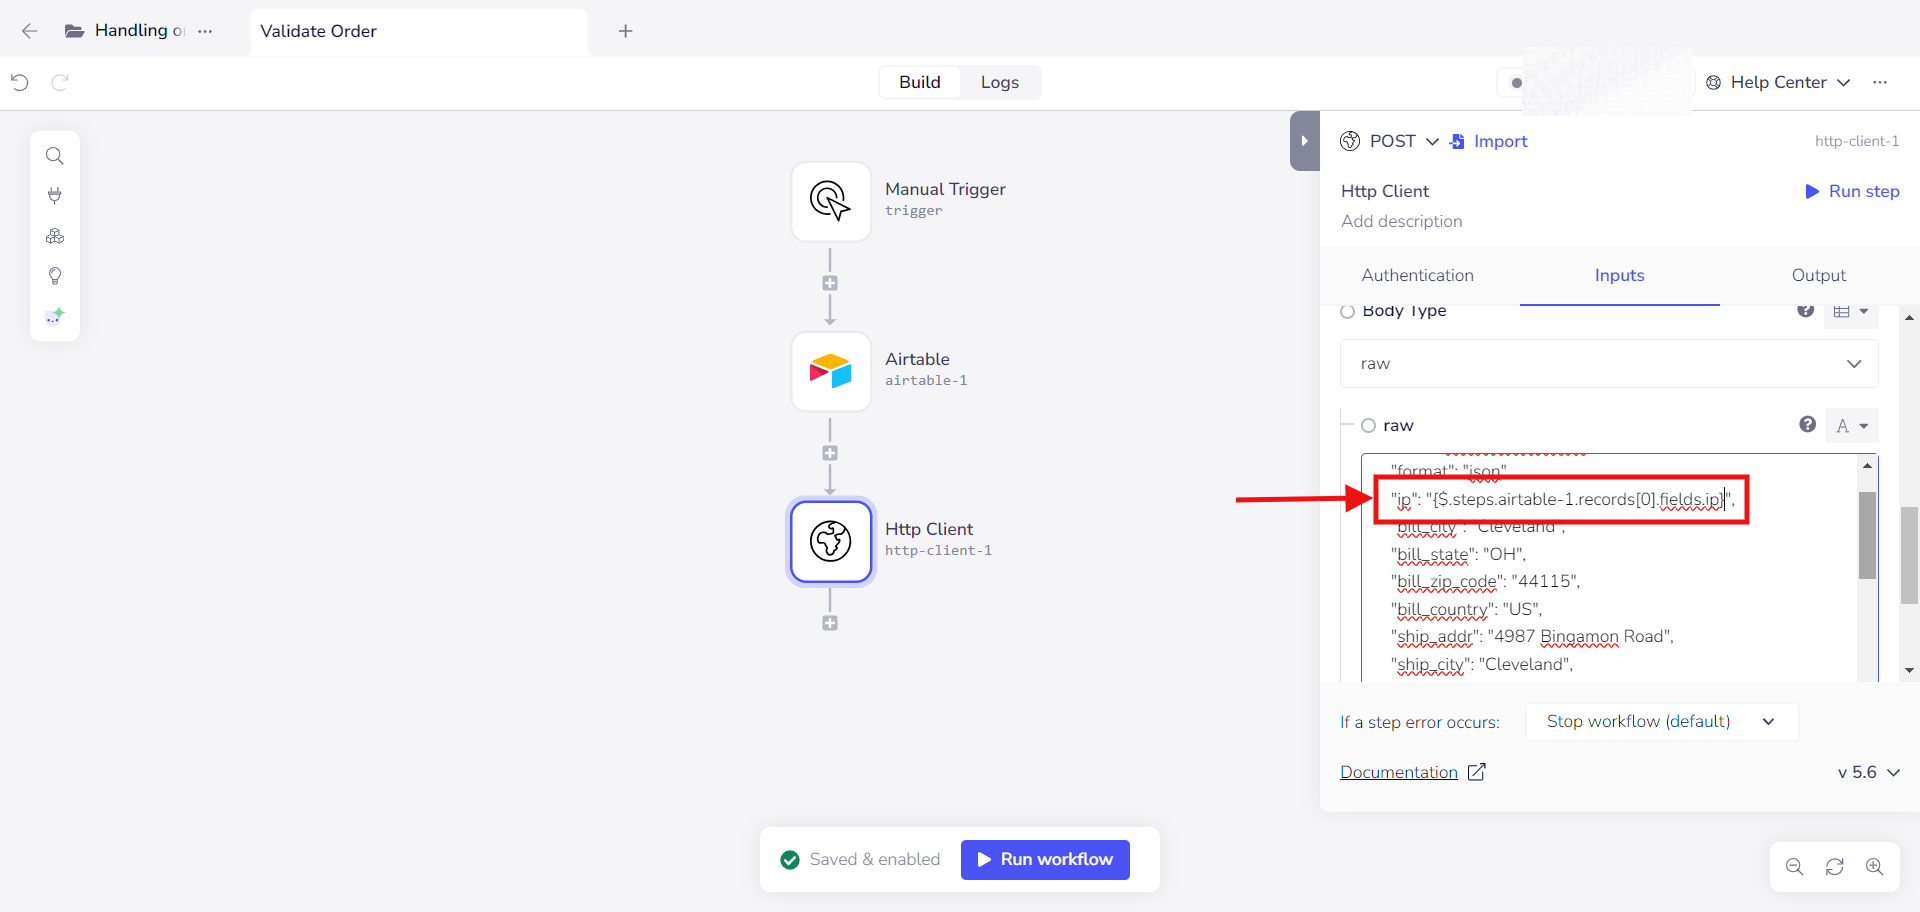
- Scroll down to the Body Type->raw, and start to replace the value with the data from the Airtable. For example, if you want to replace the IP address, you can replace the “IP_Address” with this value “
{$.steps.airtable-1.records[0].fields.ip}“. You can replace other fields as well according to what you had in your table view.
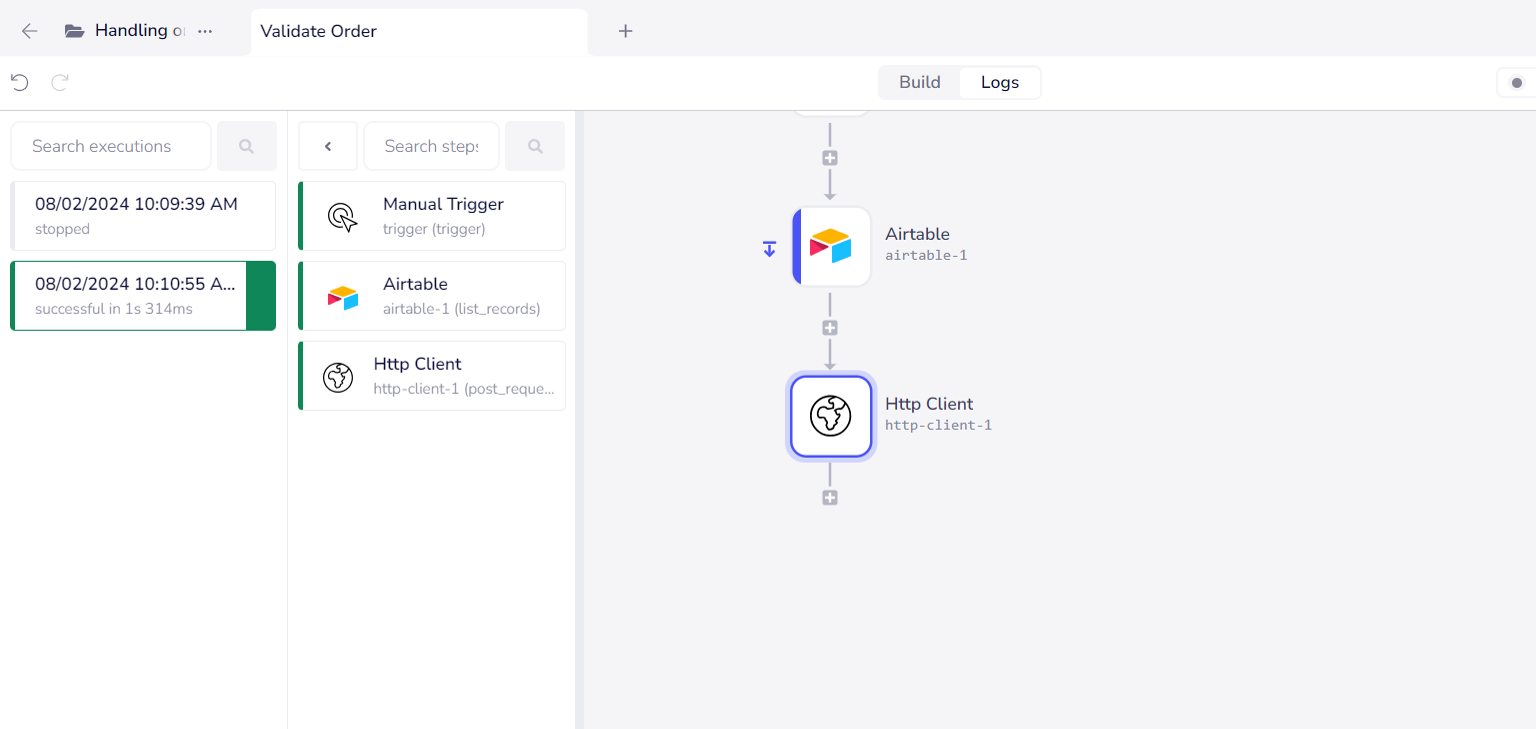
- You can now click on the Run workflow button to run this workflow. You can click on the Logs tab to check the status of the run. If the run successful, you will see the execution entry with a green color and a successful message.
- That’s it! Now you have learnt how to validate orders using FraudLabs Pro API in Tray.io. For the next step, you can insert back the validated result returned back to the Airtable, although we won’t cover that in this tutorial.