In tandem with the introduction of the Blacklist Menu which allows users to easily blacklist a list of records, we took another step further to simplify the blacklist process for a transaction.
Previous Way to Blacklist A Transaction
Previously, the Fraud Report button was introduced to allow users to report to us if a transaction was incorrectly approved. However, this button is only visible when viewing Approved transactions, leaving the user with no option to report those transactions with other statuses, such as Pending Review or Rejected. We truly understand the frustration and the inconvenience with having to email us manually to blacklist that transaction. Hence, this is the main reason why we have introduced the new Blacklist button to replace the Fraud Report button for the blacklist simplicity. Below is the screenshot of the previous Fraud Report Button, in case you have not seen it before.

New Way to Blacklist A Transaction
The functionalities of the new Blacklist button is similar to the Fraud Report button except this new button will be presented on the screen for any transaction status, i.e. Pending Review, Approved or Rejected. In other words, you can now blacklist the transaction regardless of the transaction status.
What Would Happen If The Blacklist Button is Clicked?
Basically, the system will automatically reject the transaction if the status is not Rejected and will record the blacklist information into the central repository. This blacklisted information will then be immediately used for the next transaction validation. Please take note that the system will store the blacklist information in either a public or private mode, which is configurable on the settings page. You may visit the Blacklist Menu tutorial for details.
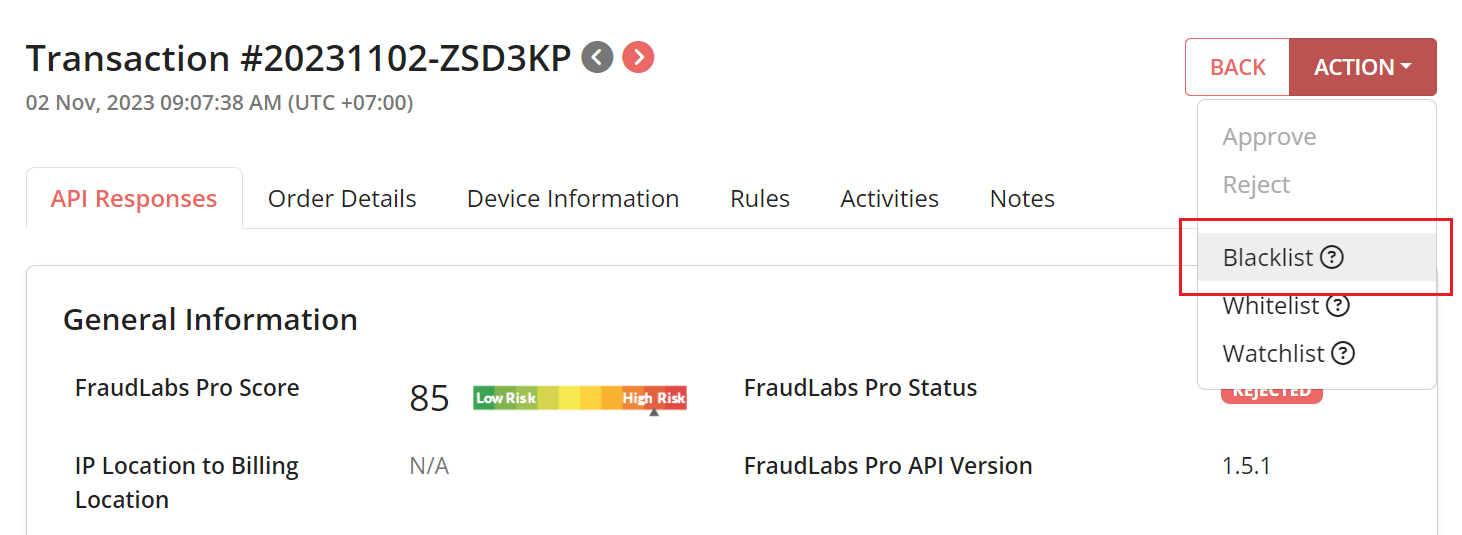
Please do note that the Blacklist button has been placed at the top of the page in Action menu if compared to the previous Report Fraud button. Below is the screenshot of the new Blacklist Button.

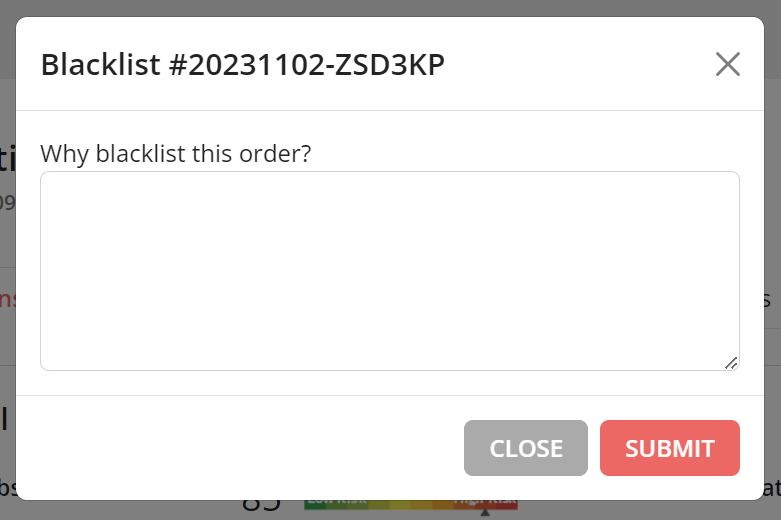
Please take note that users can only blacklist a transaction once and the button will disappear right after the click. This is to prevent duplicate blacklisting of the same transaction. During the blacklist process, users will be required to enter the reasons for the transaction to be blacklisted. Below is the screenshot of the message box.

Benefits of Blacklist A Transaction
When you blacklisted a transaction, our system will learn this information in real-time and will block the blacklisted clients from future purchases by increasing the fraud score. The more the system is trained with blacklisted information, the more accurate the validation results will become.
However, it has to be understood that the blacklist is only meant for known fraud transactions and shouldn’t be used for other non-fraud reasons. Instead, the Reject action should be used in those cases. This is to ensure that the system is not corrupted with biased data which may result in inaccurate fraud validations. You may also create blacklist validation rules to accurately detect and bar the blacklisted clients from performing any purchase.
We encourage users to use this simple yet easy feature to blacklist those transactions that are known to be fraudulent. We do have plans to embed this Blacklist button directly into the ready plugins in phases, so that users could perform the blacklist without the need to leave the e-commerce platforms.
Ready to start with FraudLabs Pro?
Get Micro plan for free, you can quickly explore and integrate with our fraud prevention solution in minutes.